
 Save
Save
This Japanese comfort dish has completely changed how I handle weeknight meals with its amazing mix of crunchy cutlets and rich sauce. When you bite in, you'll love how the crispy outside pairs with the soft meat inside, bringing restaurant-level food straight to your dinner table.
I first tried katsu bowls on my trip to Japan and I've been tweaking this dish ever since. Now it's so popular at my house that my family asks for it every week - it's turned into our end-of-week treat that nobody wants to miss.
What You'll Need
- Pork loin cutlets or boneless chicken breasts: try to get cuts with a bit of fat running through them for extra juiciness
- Panko breadcrumbs: these Japanese breadcrumbs give you that super crunchy coating you won't get from regular ones
- All purpose flour: this makes the egg stick better and builds the base of your coating
- Large eggs: they work as the glue that makes everything stick together properly
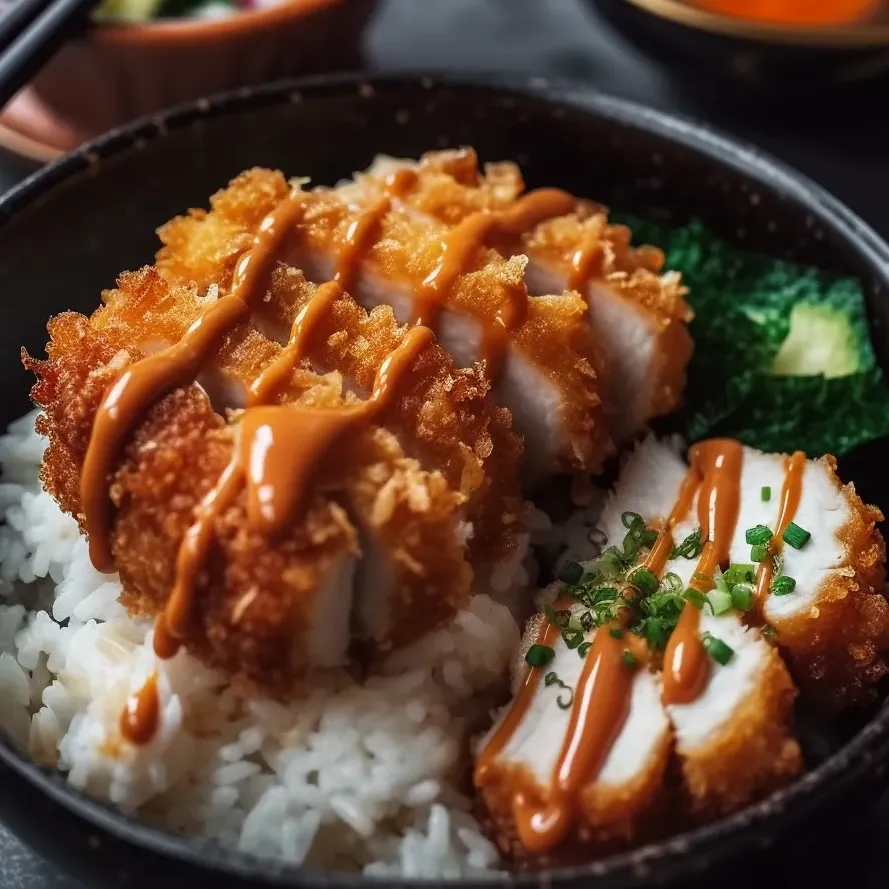
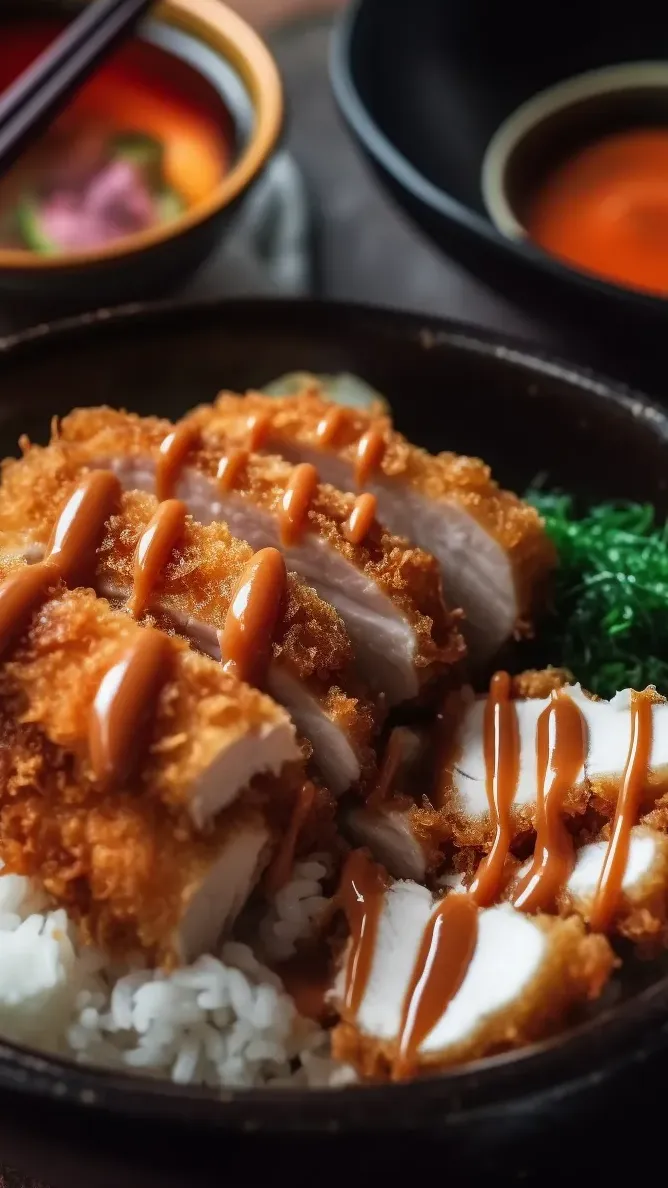
- White rice: go for sushi rice if you can - its stickiness works really well with the meat
- Tonkatsu sauce: this sweet and tangy topping really makes the whole dish come alive
- Frying oil: canola or vegetable oil won't burn when it gets hot, so your coating turns golden brown
- Fresh herbs: you don't have to use these, but they add some nice color and freshness
How To Make It
- Get Your Meat Ready:
- Make your chicken breasts or pork cutlets about half an inch thick by hitting them with a rolling pin or meat hammer. This helps them cook evenly and stay tender. Sprinkle salt and pepper on both sides so the flavor soaks into the meat.
- Create Your Coating Area:
- Put out three shallow dishes in a row. Fill the first with flour, the second with beaten eggs, and the third with panko breadcrumbs. This setup makes the whole process smoother and less messy. Try to use one hand for dry stuff and one for wet to avoid getting everything clumped together.
- Coat Your Meat:
- First, roll each piece of meat in the flour and shake off any extra. Next, dip it fully in the egg mixture, letting drips fall back in the dish. Last, press it firmly into the panko until it's completely covered on all sides. You shouldn't see any spots without breadcrumbs.
- Cook Until Crunchy:
- Pour about half an inch of oil in a big pan and heat it to around 350°F. You can check if it's hot enough by dropping in a few breadcrumbs - they should bubble right away. Fry chicken for about 3-4 minutes on each side, or pork for 2-3 minutes, until they're golden brown. Chicken should reach 165°F inside, and pork should hit 145°F.
- Put It All Together:
- Put a nice layer of fluffy rice in each bowl. Cut the crunchy meat into strips and lay them on top of the rice. Pour plenty of tonkatsu sauce over the meat, letting it run down onto some of the rice too. If you want, throw on some fresh herbs for a splash of color.
The thing I love most about this dish is when you crunch through that super crispy outside and get to the juicy meat inside. That mix of textures is what makes katsu so hard to resist. I can still remember eating it at a small place in Tokyo where the cook had spent years getting this one dish just right.
Whip Up Your Own Sauce
Store-bought sauce works fine, but making your own takes this dish to another level. Mix ketchup with Worcestershire and soy sauce for the perfect blend of sweet and savory flavors. You can add more or less sugar depending on how sweet you like it. Some people even throw in some grated apple for natural sweetness and extra flavor. If you make a big batch, it'll stay good in the fridge for two weeks in a sealed container, so it's worth taking a few minutes to make extra.
Getting Your Rice Just Right
Good rice is the base of any great katsu bowl. For the real deal, wash your sushi rice until the water looks clear - this gets rid of extra starch. Use 1 part rice to 1.1 parts water, and after cooking, let it sit covered for 10 minutes. This waiting step lets moisture spread through all the grains, giving you rice that's sticky but still fluffy, which goes great with the crunchy meat.
Mix It Up
While the basic katsu bowl has rice and breaded meat, there are tons of ways to make it your own. Add some shredded cabbage for extra crunch - that's how they do it in Japan. For a full meal, throw in some quick-pickled veggies or kimchi for a tangy kick. Many Japanese families pour curry sauce over their katsu instead of the regular sauce. If you want a healthier version, you can bake your breaded cutlets at 400°F for 20 minutes instead of frying them.

Frequently Asked Questions
- → Can I bake the katsu instead of frying?
Absolutely! For a healthier version, coat the breaded meat with a bit of oil and bake at 400°F (200°C) for around 20-25 minutes. Don't forget to flip them halfway. They won't be quite as crunchy as fried ones but they'll still taste great.
- → What can I serve with katsu bowls?
Great pairings include simple cabbage slaw, a bowl of miso soup, some pickled veggies, or a light cucumber salad. Want to make your bowl more filling? Try adding some steamed broccoli or edamame right in there.
- → Can I make katsu bowls ahead of time?
The katsu tastes best when you eat it right after cooking while it's still crunchy. But you can prep the meat up to the breading step and keep it in the fridge for a few hours before cooking. You can also make the sauce up to a week early and keep it in the fridge.
- → What's the difference between chicken katsu and tonkatsu?
It's all about the meat you pick. Chicken katsu uses chicken pieces while tonkatsu means you're using pork. Everything else—how you bread it, fry it, and the sauce you use—stays pretty much the same for both kinds.
- → Is there a gluten-free option for katsu?
You bet! Just swap regular flour for rice flour or a gluten-free mix, and grab some gluten-free panko crumbs. Don't forget to check that your Worcestershire and soy sauce don't have gluten in them when you're making the sauce.
- → How do I know when the oil is ready for frying?
No thermometer? No problem! Just toss a few panko crumbs into your oil. If they bubble up right away and float, your oil is good to go (that's about 350°F/175°C). If they sink or burn too fast, you'll need to adjust your heat up or down.