
 Save
Save
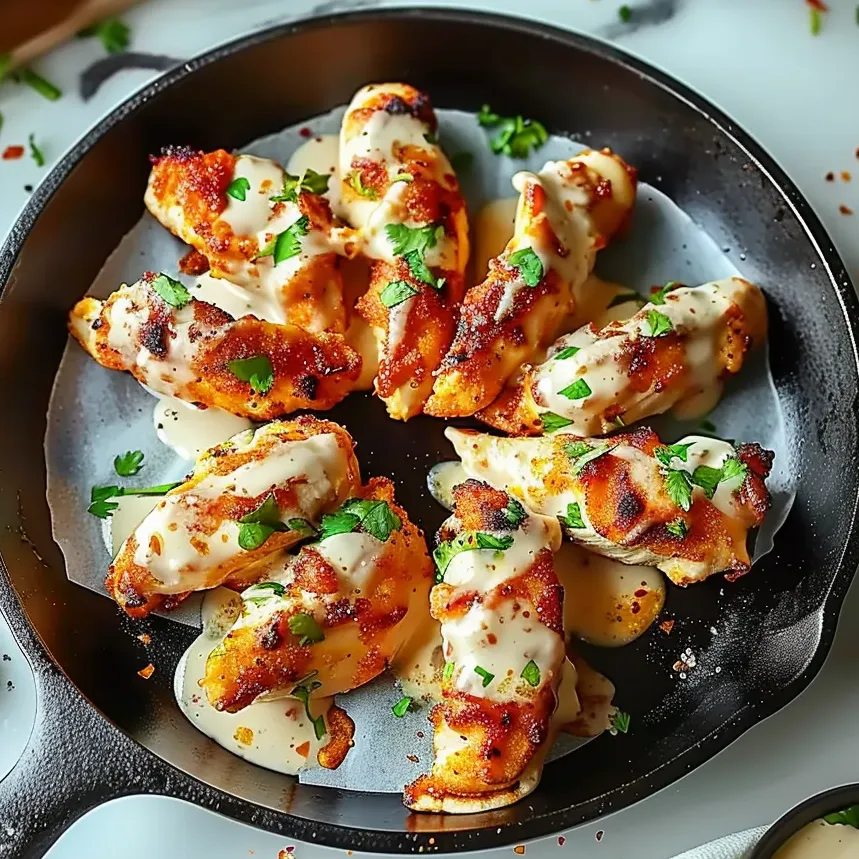
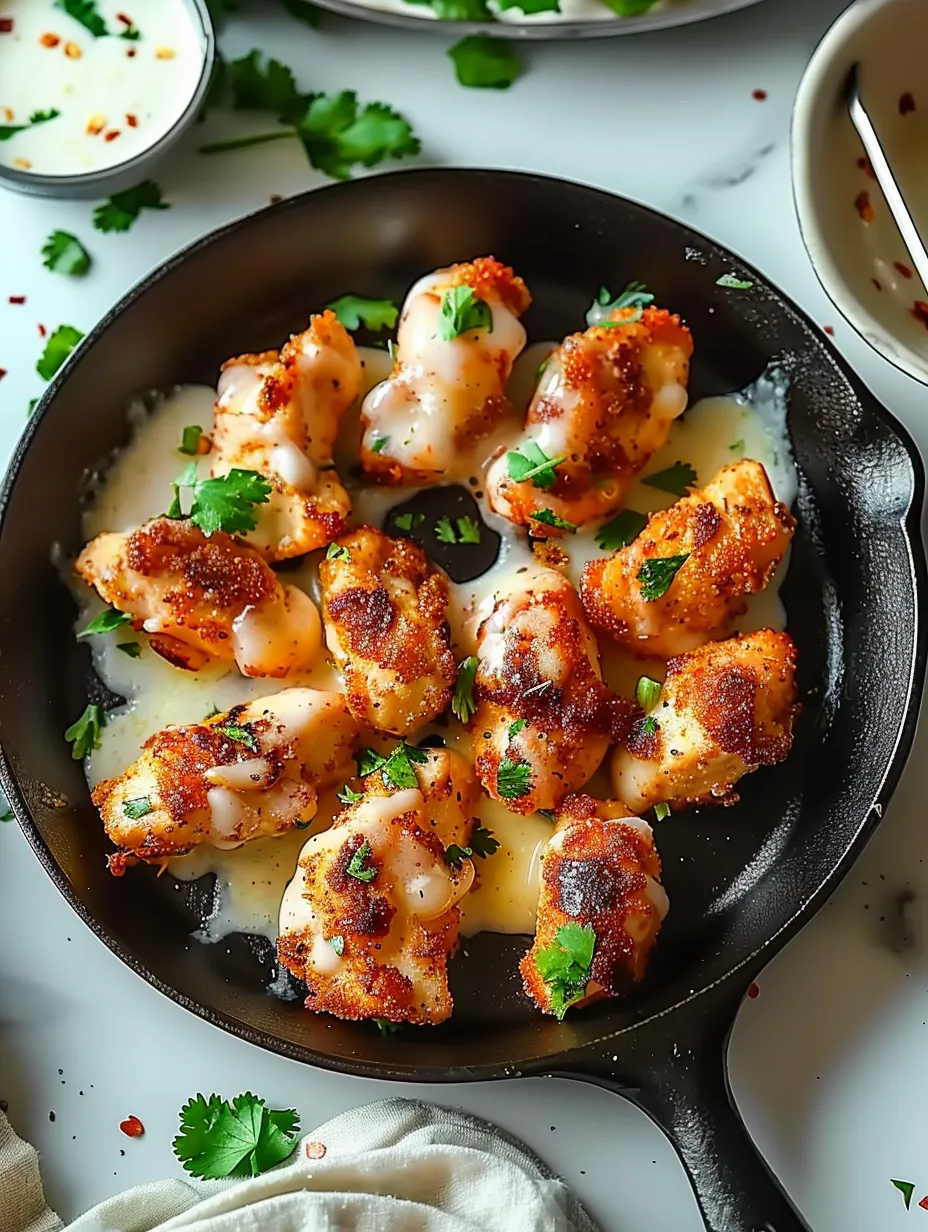
My go-to dinner savior is this super moist chicken wrap - perfect when you need something quick but filling that the whole family will gobble up. Wrapping garlicky chicken and gooey cheese in a warm tortilla gives you that takeout taste without all the work.
I whipped these wraps up during a hectic Christmas season when we wanted something substantial between all those fancy holiday feasts. These days my kids ask for them almost every week, especially when we're having movie nights and need finger food.
What You'll Need
- Chicken breasts they soak up all the yummy flavors and give you that satisfying bite
- Olive oil helps your chicken brown nicely without getting stuck to your pan
- Garlic powder gives that mouth-watering savory kick throughout your meat
- Onion powder brings subtle sweetness without chunky onion pieces
- Dried oregano and basil add that Italian flair that works magic with the cheese
- Mozzarella cheese gives you those irresistible cheese pulls everyone wants in their wrap
- Parmesan cheese adds that salty kick that makes everything taste better
- Flour tortillas grab the big ones so everything stays tucked inside
- Sour cream brings a tangy creaminess that cuts through the rich cheese
- Fresh parsley adds a pop of color and fresh taste
- Butter makes everything richer and helps get your wraps nice and crunchy
How To Make It
- Get your pan hot
- Let a big skillet warm up over medium heat. A properly heated pan means your chicken will brown rather than steam.
- Add some fat
- Pour olive oil into your hot skillet and give it about a minute to warm up until it looks shiny. This stops your chicken from sticking and helps it brown evenly.
- Cook your chicken
- Toss those chicken breasts in and let them sizzle for around 6-7 minutes on each side. Look for a nice golden crust before you flip them. They're done when they hit 165°F inside, which keeps them safe but still juicy.
- Mix your spices
- While your chicken cooks, stir together garlic powder, onion powder, oregano, basil, salt and pepper in a little bowl. Mixing beforehand makes sure the flavors spread evenly through your dish.
- Let chicken rest
- Take your cooked chicken off the heat and set it aside on a plate. This rest time lets all those tasty juices settle back into the meat so it stays moist.
- Melt some butter
- Drop butter into that same skillet and let it melt completely, swirling it around. The butter adds richness and picks up all those yummy chicken bits left in the pan.
- Pull the chicken apart
- Grab two forks and shred your chicken into small bits. Smaller pieces spread better in your wrap and make eating less messy.
- Add flavor to chicken
- Put your shredded chicken back in with the melted butter and sprinkle all those spices on top. Stir everything well so each piece gets coated with flavor.
- Melt in cheese
- Toss in both cheeses and keep stirring until they're completely melted. Keep your heat medium-low so the cheese gets creamy instead of burned.
- Heat your wraps
- Quickly warm each tortilla in the pan for about 30 seconds per side until they're soft and slightly golden. Warming makes them stretchy and less likely to tear when you roll them.
- Start building
- Lay each warm tortilla flat and spread a thin layer of sour cream down the middle. This creamy base helps hold everything together.
- Add your filling
- Spoon the cheesy chicken mixture evenly onto each tortilla, but don't overstuff or they might burst when rolling.
- Sprinkle herbs
- Scatter fresh parsley over each portion of chicken to add a fresh pop of flavor and color.
- Wrap them up
- Fold in the sides of each tortilla, then roll from bottom to top to make a tight package. Keep the sides tucked in as you roll to prevent filling from escaping.
- Make them crunchy
- Put your wrapped bundles back in the pan with the seam facing down and cook for 1-2 minutes on each side until golden and crispy. Press gently with a spatula for even contact with the pan.
- Dig in
- Cut the hot wraps diagonally and eat them right away while the cheese is still gooey and the outside is crunchy.

Dried herbs are the real MVP in this dish. While fresh herbs work in lots of recipes, dried oregano and basil actually do a better job here because they pack stronger flavor into the oil and butter. My grandma shared this trick with me when I was younger, and now I keep lots of dried herbs around just for meals like this.
Switch Up Your Cheese
The cheese you pick can totally change these wraps. Mozzarella gives that classic stretchy pull, but try swapping in pepper jack for some heat or provolone for something fancier. Want to make them extra special? Mix in a bit of cream cheese before rolling - it creates little pockets of creamy goodness throughout your wrap.
Getting your cheese just right comes down to watching your heat. If your pan's too hot, the cheese gets oily instead of creamy. Keep the temperature medium-low when you add your cheese and don't stop stirring - that's how you get that smooth, velvety texture that makes these wraps so darn good.
Prep Ahead Ideas
These wraps are perfect for planning ahead. You can make the cheesy chicken filling up to three days early and keep it in the fridge in a sealed container. When you're ready to eat, just warm the filling in a pan, add a tiny splash of water if it looks dry, and then make your wraps.
For super busy weeks, I like to double the recipe during Sunday meal prep. The filling freezes really well for up to two months. Just thaw it overnight in your fridge, then gently reheat in a skillet with a pat of butter to wake up all those flavors.
What to Serve With Them
These wraps are totally filling on their own, but adding a side dish takes dinner up a notch. A basic green salad with lemon dressing gives a fresh contrast to the rich wraps. If you want something more filling, try some roasted sweet potato wedges dusted with smoked paprika on the side.
When friends come over, try cutting the finished wraps into little pinwheels with toothpicks stuck through them for an easy finger food. Serve them with a cool cilantro-lime dipping sauce that balances out all that warm, cheesy goodness.
Expert Advice
Let your chicken sit for at least 5 minutes before you shred it so all those tasty juices stay locked inside instead of running out onto your cutting board.
Don't switch pans between steps because the same skillet builds up amazing flavors as each new ingredient picks up leftover seasonings from what came before.
Want extra crispy wraps? Brush a little butter on the outside of each tortilla just before you put them back in the pan for that final toast.
Frequently Asked Questions
- → Can I fix these wraps beforehand?
Totally. You can make the chicken and cheese mix up to 2 days early and keep it in the fridge. When you're ready to eat, just warm up the filling, put it in fresh tortillas, and toast them in a pan.
- → What goes well with these chicken wraps?
They taste great with a basic green salad, oven-baked veggies, crispy sweet potato fries, or a small bowl of soup. If you want something more relaxed, try them with corn chips and homemade salsa or guac.
- → Can I use store-bought roasted chicken?
You bet! Ready-made rotisserie chicken works really well here. Just pull apart about 2-3 cups of meat, warm it in a pan with butter, and then add your seasonings and cheese as the recipe says.
- → How do I make these wraps better for me?
For a skinnier version, grab whole grain tortillas, light cheese, Greek yogurt instead of sour cream, and throw in more veggies like fresh spinach, chopped bell peppers, or grated carrots to boost the goodness.
- → Can I freeze these wraps?
Sure thing. You can freeze them after putting them together but before the final toasting step. Wrap each one snugly in foil and they'll keep in the freezer for up to a month. To eat them later, unwrap and cook in a pan until hot and crispy on both sides.
- → What other cheeses taste good in these wraps?
Mozzarella and Parmesan give you that classic taste, but you can switch things up with cheddar, Monterey Jack, provolone, or pepper jack for different flavors. A bag of Mexican cheese blend works really well too.