
 Save
Save
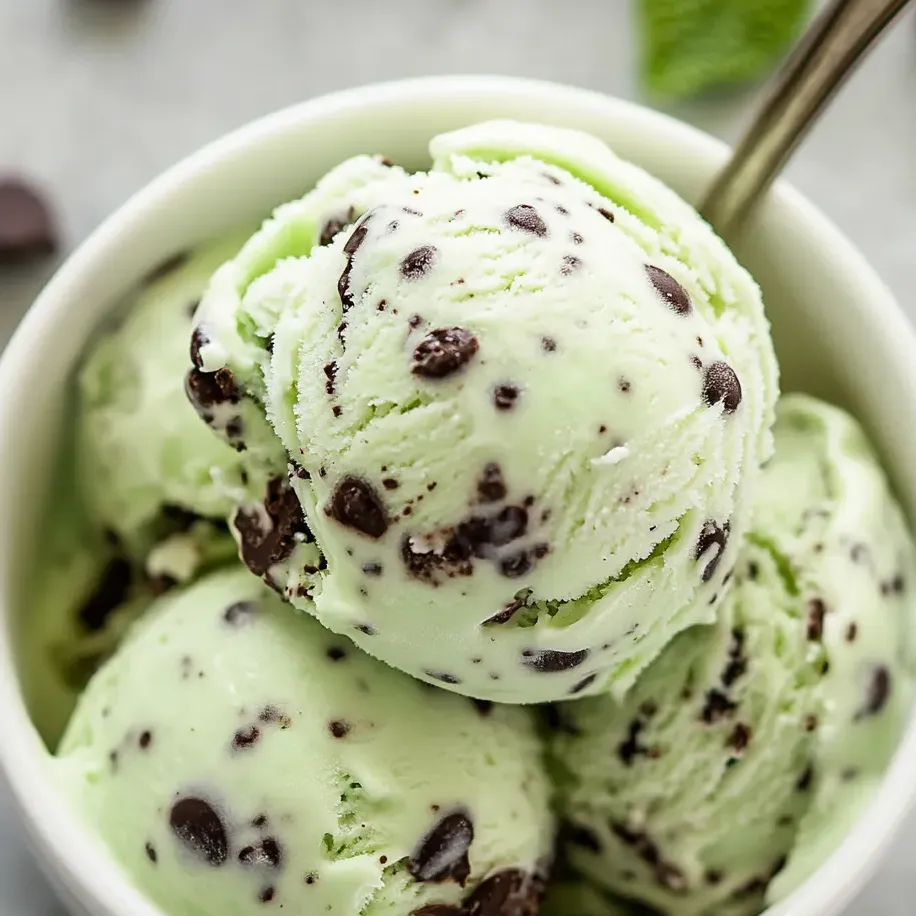
There is something purely nostalgic about homemade mint chocolate chip ice cream. The creamy sweetness balanced with cool mint and rich bits of chocolate always brings me right back to summers at home, making this in a favorite old churn with my family. Making it yourself means you get to control the intensity of the mint flavor and the quality of the chocolate, and you will taste the difference.
I first made this for my daughter’s birthday and seeing the green flecks with dark chocolate always makes us both smile. The chill time is worth it because the texture is so unbelievably creamy.
Ingredients
- Heavy whipping cream: This is the base for that luscious creamy texture Try to find cream that is not ultra pasteurized for the freshest flavor
- Whole milk: Balances the richness with the right amount of lightness Full fat is best for mouthfeel
- Granulated sugar: Sweetens but also helps the texture Opt for fine white sugar so it dissolves easily
- Egg yolks: Essential for a custard base adding richness and helping the ice cream stay scoopable Look for golden yolks from pasture raised eggs
- Vanilla extract: Complements the mint and rounds out the flavor Real vanilla makes a difference in depth of taste
- Pure mint extract: Brings that signature cool minty burst Choose pure extract over imitation for a fresher flavor
- Green food coloring (optional): Just a few drops makes it look classic Use natural gel coloring if you want to avoid artificial dyes
- Finely chopped dark chocolate or mini chocolate chips: The slight bitterness of dark chocolate plays beautifully with the sweet mint Use a good quality bar and chop to your preferred chunk size
Step-by-Step Instructions
- Prepare the Ice Cream Maker:
- Freeze the bowl of your ice cream maker well in advance This is essential for proper churning later on so plan ahead and check your manufacturer’s directions
- Make the Custard Base:
- In a large saucepan whisk together the cream milk sugar and egg yolks until absolutely smooth No lumps should remain Be thorough to ensure silky results
- Cook the Custard:
- Set the pot over medium heat Use a whisk and gently stir constantly Never let it boil Watch closely as it thickens and test by dipping a spoon if it coats the back and leaves a trail when you swipe it it is ready
- Flavor the Custard:
- With the pot off the heat stir in the vanilla mint extract and a few drops of food coloring if you are using it This way the flavors do not evaporate and the color stays bright
- Cool the Custard:
- Transfer the mixture to a large glass bowl or measuring cup and lay a piece of plastic wrap directly on the surface This keeps a skin from forming Place the whole thing in the fridge until the custard is fully cold This might take a couple of hours or overnight for best results
- Churn the Ice Cream:
- Once well chilled pour the custard into your frozen ice cream maker bowl and churn Slowly the texture will go from liquid to thick and creamy and it should look like soft serve at the end
- Add Chocolate:
- When the churning is almost finished sprinkle in the chopped chocolate or chips Gently fold in to get an even mix without all the chocolate sinking to the bottom
- Freeze Until Firm:
- Spoon the finished ice cream into a loaf pan or freezer safe dish Smooth the surface cover well and freeze solid for several hours so it is scoopable
- Scoop and Serve:
- Let the ice cream sit on the counter for a few minutes to soften before scooping The texture will be just like your favorite ice cream shop
My favorite part is always picking out that perfect bar of chocolate to chop up Each swirl of chocolate in the minty cream reminds me of eating cones by the pool with my brother racing to finish before it melted
Storage Tips
For best texture keep your ice cream covered tightly in the freezer to avoid ice crystals. Press a sheet of wrap right to the surface before sealing with a lid. Always use a dry scoop and return the ice cream promptly after serving.
Ingredient Substitutions
If you like a richer flavor swap in extra cream for some or all of the milk. You can use peppermint extract if you cannot find pure mint. For a dairy free version try full fat coconut milk and a plant based chocolate. Skip the food coloring for a natural look.
Serving Suggestions
Serve this classic treat in cones or bowls topped with a sprig of fresh mint or some extra chocolate shavings. It is perfect between two soft chocolate cookies for homemade ice cream sandwiches. Drizzle with hot fudge for a decadent sundae.
History of Mint Chocolate Chip
Mint chocolate chip has been a staple in American ice cream parlors for generations. Invented mid century it quickly became known for its refreshing taste and striking green hue. Making it at home brings all that old fashioned charm with better ingredients.
Frequently Asked Questions
- → What type of chocolate works best?
Finely chopped dark chocolate or mini chocolate chips deliver the best flavor and texture, ensuring even distribution throughout the frozen dessert.
- → Can I adjust the level of mint flavor?
Yes, using pure mint extract allows you to fine-tune the strength of mint to suit your taste preferences.
- → How do I achieve a vibrant green color?
Add a few drops of green food coloring to the custard before chilling for that classic mint appearance, or omit for a natural look.
- → Is an ice cream maker necessary?
An ice cream maker creates a smoother, creamier texture by churning as the mixture chills. For best results, use as directed, but alternative no-churn methods exist.
- → How do I store homemade ice cream?
After transferring to a covered container, freeze for up to three months. Let it sit at room temperature briefly before scooping for easier serving.
- → Can the richness be adjusted?
Substitute additional cream for milk to create a richer, more decadent dessert, as noted in the variations.