
 Save
Save
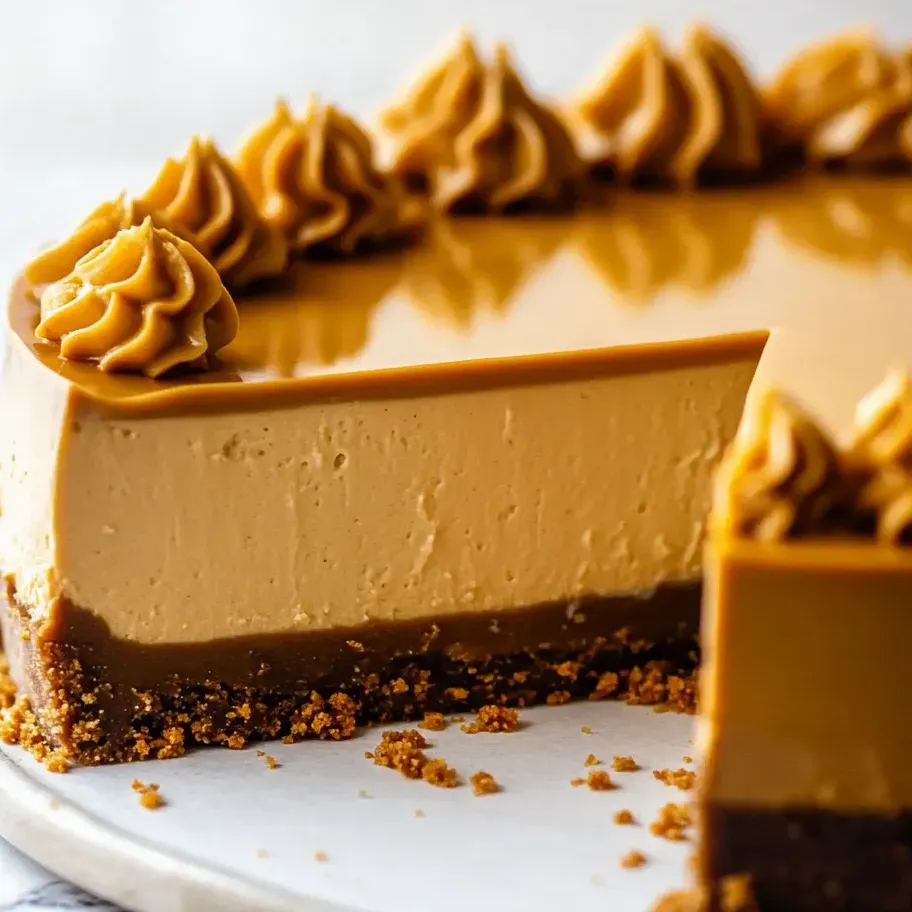
Loaded Butterscotch Cheesecake Cream is pure comfort in dessert form, with layers of creamy tangy filling and a thick swirl of butterscotch both inside and out. If you crave cheesecakes that are rich yet balanced with a little salt and deep flavor, this recipe is about to become a favorite.
My family could never agree on one birthday dessert but after trying this cheesecake for a low key celebration I found the pan empty by midnight and have been making it ever since for every big milestone.
Ingredients
- Graham cracker crumbs for the crust: These add a toasty foundation with crunch Check for freshness and use a food processor for fine texture
- Light brown sugar: in both crust and filling for a sweet caramel undertone Look for soft clump free sugar
- Unsalted butter for the crust: which keeps the base from getting soggy Choose fresh high quality sticks for best flavor
- Full fat brick style cream cheese: for ultimate creaminess Avoid tub style cream cheese as it is too soft
- Sour cream: brings tang and keeps the texture velvety Select full fat for richest flavor
- Heavy whipping cream: thins out the filling and ganache Use well chilled cream for whipping and pouring
- Butterscotch chips: are key for flavor depth Try to choose premium brands with real butter content
- All purpose flour: stabilizes the filling and helps it slice cleanly
- Vanilla extract: rounds out all the sweet notes Pure extract always brings out the best flavor
- Dry butterscotch pudding mix: boosts the butterscotch taste and thickens the batter Instant versions work best for mixing
- Eggs: provide structure and silkiness Use room temperature eggs for smoother blending
- Additional butterscotch chips and cream for the ganache topping: for a glossy sweet finish
Step-by-Step Instructions
- Prepare the Pan
- Line the springform pan with parchment on the bottom and lightly grease the sides This step makes removing your cheesecake much easier later
- Make the Crust
- Combine graham crumbs brown sugar and melted butter in a bowl Mix thoroughly until every crumb glistens then press mixture into the base and up the sides of the pan Use a glass to compact tightly Bake the crust until it is just golden and set aside to cool fully before filling
- Protect the Pan
- Wrap the outer pan with a double layer of foil Press tightly to prevent water from sneaking in during the water bath A dry crust is a must
- Prepare the Filling Base
- Beat the cream cheese with brown sugar and flour on low Scrape the bowl thoroughly after every minute You want everything perfectly smooth with no lumps or dry patches
- Add Flavor Elements
- Blend in sour cream and vanilla Pour in slowly and blend on low just until mixed
- Melt the Butterscotch
- Warm cream and butterscotch chips together using the microwave Start with 20 seconds then stir well Heat again if needed until the mixture is glossy and chip free
- Build the Filling
- Mix the melted butterscotch into the cream cheese bowl in two portions Always scrape the sides Add pudding mix and blend until totally smooth
- Finish with Eggs
- Add eggs one by one Gently beat each in on low stirring and scraping often to avoid overmixing which can cause cracks
- Set Up the Water Bath and Bake
- Pour the silky filling into the cooled crust Place the springform inside a roasting pan Pour hot water into the outer pan until it comes halfway up the springform sides Bake until the edges are set but the center still jiggles like jello
- Cool Gradually
- Let the cheesecake rest in the turned off oven for half an hour then crack the door for ten more minutes This gentle cooling helps prevent sinking or cracks
- Chill Fully
- Cool to room temp on a rack then refrigerate for at least five hours Overnight is even better for the texture
- Add the Ganache Topping
- Heat cream and pour it over butterscotch chips Let sit then whisk smooth Let cool a few minutes then pour over the cheesecake letting it drip slightly over the edges Top with extra chips
- Serve and Store
- Cover and keep your finished cheesecake chilled Slice with a hot sharp knife wiping clean between cuts for that perfect bakery finish

Each time I make this cheesecake I save a few butterscotch chips to sprinkle over kids' ice cream bowls we always sneak a few from the bag together in the kitchen My personal favorite is licking the spatula after swirling in the ganache
Storage Tips
Leftovers will stay delicious and creamy covered in the fridge for three to four days Always keep the cheesecake chilled Slice only what you need and return the rest to the cold Quickly freeze individual slices on a tray uncovered then wrap in plastic and store in a container for up to two months Thaw in the fridge for best texture
Ingredient Substitutions
You can swap vanilla wafer crumbs for graham crackers and use other flavors of pudding mix if you wish Gluten free bakers can use cornstarch instead of flour but only half the amount for proper thickening For a slightly different flavor try adding a pinch of salt to the crust or the ganache

Serving Suggestions
This cheesecake shines alone but is also great with a dollop of whipped cream or even a scattering of toasted nuts Serve cold right out of the fridge for the creamiest texture and neatest slices I love serving small slices alongside strong black coffee or a glass of dessert wine
Cultural and Historical Context
Cheesecake has been a classic dessert since ancient times but the American tradition of a dense bakes cheesecake layered with flavored chips and toppings really took off in the twentieth century Butterscotch is an old fashioned favorite that brings nostalgia for school lunches and holiday treats and works beautifully in cream cheese based desserts
Frequently Asked Questions
- → How do I achieve a smooth cheesecake filling?
Use room temperature cream cheese and eggs, and mix on low speed to avoid incorporating too much air for a silky texture.
- → Why use a water bath while baking?
A water bath provides gentle, even heat, reducing the risk of cracking and ensuring a creamy result.
- → Can I substitute the graham crackers in the crust?
Yes, use vanilla wafer crumbs for variation or gluten-free alternatives if needed for dietary restrictions.
- → How do I prevent the cheesecake from sticking to the pan?
Line the pan with parchment paper and lightly grease the sides to help with easy removal once chilled.
- → What's the best way to slice clean portions?
Use a sharp knife dipped in hot water, wiping clean between slices for neat, attractive portions.
- → How should leftovers be stored?
Refrigerate covered for optimal freshness. For longer storage, freeze without topping for up to three months and thaw before serving.