
 Save
Save
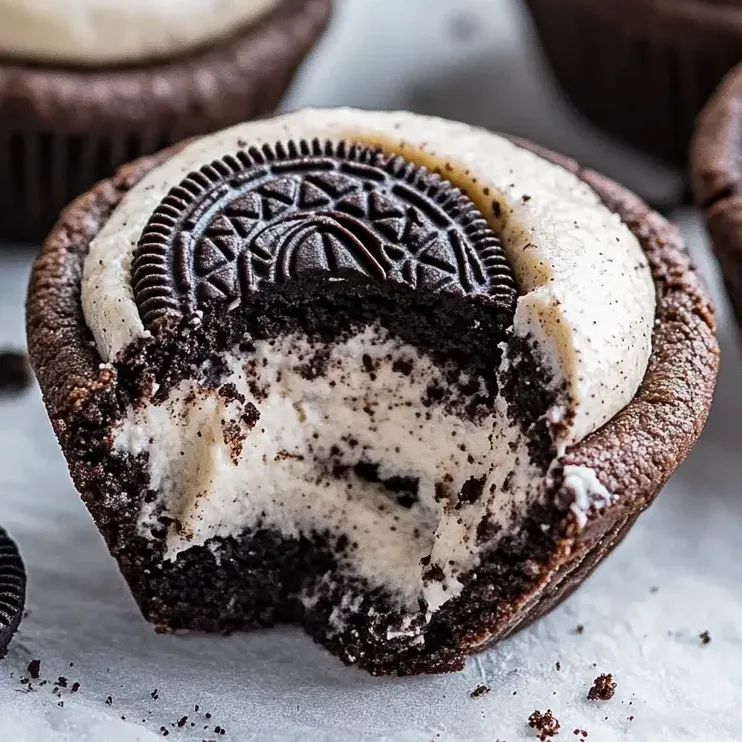
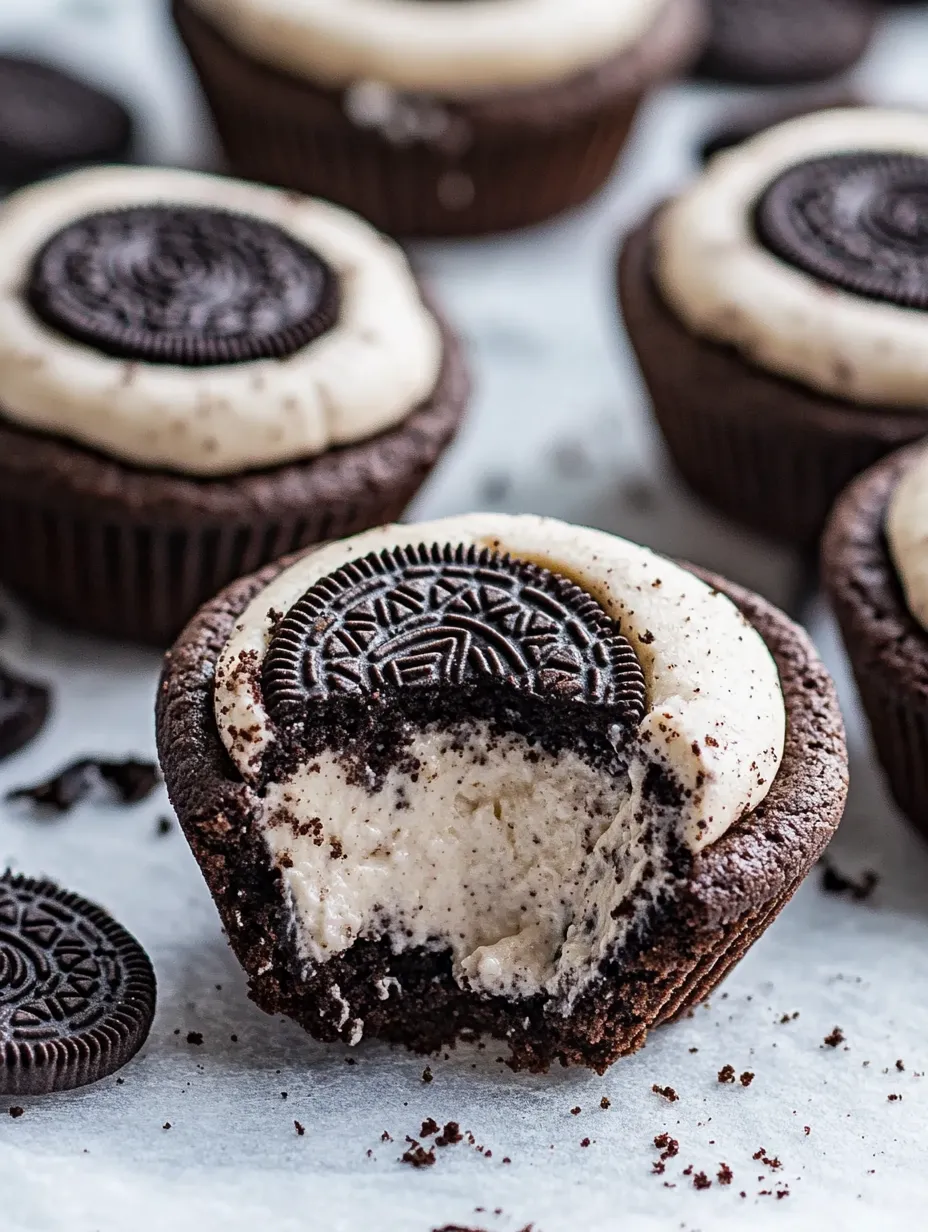
These rich, decadent Oreo cheesecake cookie cups combine the best of two worlds – crisp chocolate cookie shells filled with creamy Oreo cheesecake filling. I created these for my daughter's birthday party last year, and they've become the most requested dessert at every family gathering since.
These cookie cups make regular appearances at our family movie nights. The combination of the slightly crisp exterior with the silky cheesecake center creates such a satisfying contrast that everyone reaches for seconds.
Ingredients
- All purpose flour: forms the base of our cookie cups ensuring the perfect structure to hold the filling
- Dutch processed and black cocoa powders: create that intense chocolate flavor reminiscent of Oreos themselves
- Unsalted butter: at room temperature creams perfectly with the sugars for the ideal cookie texture
- Full fat cream cheese: provides the signature tangy richness essential for authentic cheesecake flavor
- Heavy whipping cream: lightens the filling creating an airy mousse like texture
- Oreo cookie crumbs: infuse the filling with that unmistakable Oreo flavor we all love
Step-by-Step Instructions
- Prepare the oven and pans:
- Preheat your oven to exactly 350°F and thoroughly spray your muffin tins with cooking spray, ensuring you coat the sides well. This preparation is crucial for easy removal of the cookie cups later.
- Mix dry ingredients:
- Whisk together the flour, both cocoa powders, baking soda, and salt until completely combined. The different cocoa powders create that distinctive Oreo color and flavor depth that makes these treats special.
- Cream the butter and sugars:
- Beat the butter with both sugars for a full 2 to 3 minutes until the mixture becomes noticeably lighter in color and fluffier in texture. This step incorporates air which helps achieve the perfect cookie texture.
- Add wet ingredients:
- Reduce your mixer speed before adding the eggs one at a time, allowing each to fully incorporate before adding the next. The vanilla goes in last, and mixing until just combined prevents tough cookies.
- Combine wet and dry:
- Add the dry ingredients to your butter mixture gradually, mixing just until no flour streaks remain. Overmixing at this stage can develop gluten and result in tough cookie cups.
- Shape the cookies:
- Use a 3 tablespoon cookie scoop for consistent sizing, placing each portion into the muffin cavities and gently pressing to flatten slightly. This creates the base for our cookie cups.
- Bake and shape:
- Bake just until the edges are set but centers remain soft, about 10 to 13 minutes. Immediately press centers with a small jar while hot to create wells for the filling. The cookies will be soft but will firm up as they cool.
- Prepare whipped cream:
- Whip the cold heavy cream using a chilled bowl and whisk until stiff peaks form. This creates volume and lightness in the filling.
- Make cheesecake mixture:
- Beat the cream cheese and sugar together until absolutely smooth, then incorporate the Oreo crumbs completely. Any lumps now will be visible in the final dessert.
- Combine filling ingredients:
- Carefully fold the whipped cream into the cream cheese mixture using a gentle motion to maintain air bubbles. This creates the light, mousse like texture.
- Fill the cookie cups:
- Pipe or spoon the filling into fully cooled cookie cups, filling each one generously. The filling should be slightly mounded above the edge of each cup.
- Chill and serve:
- Refrigerate for at least 1 to 2 hours until properly set. This patience is rewarded with the perfect texture contrast between cookie and filling.
I find that using the combination of regular Dutch processed and black cocoa powders creates that authentic Oreo flavor profile that simply cannot be achieved with just one type. The first time I served these at a family gathering, my brother in law ate four before dinner even started!
Storage Tips
These cookie cups will maintain their best quality when stored in the refrigerator in an airtight container for up to 3 days. For longer storage, place them in a single layer on a baking sheet to freeze until solid, then transfer to a freezer safe container with parchment between layers. They'll keep beautifully for up to 4 weeks.
Flavor Variations
The basic cookie cup template opens endless possibilities for creative flavor combinations. Try replacing the Oreo crumbs with crushed graham crackers and adding lemon zest to the filling for a lemon cheesecake version. You could also incorporate mini chocolate chips or peanut butter into the filling for different flavor profiles while keeping the chocolate cookie cup base.
Serving Suggestions
These cookie cups shine when served slightly chilled but not ice cold, allowing the flavors to fully develop. Pair them with fresh berries on the side, a drizzle of chocolate sauce, or even a small scoop of vanilla ice cream for an elevated dessert experience. For special occasions, dust with a light sprinkle of cocoa powder or add a small Oreo cookie piece as garnish.

The History Behind the Recipe
This recipe combines two American dessert icons into one perfect bite. Oreo cookies, created in 1912, have become the best selling cookie in the United States, while cheesecake traces its modern American popularity to the early 20th century when cream cheese was developed. This fusion dessert represents the playful innovation that characterizes modern American baking traditions while honoring these classic flavors.
Frequently Asked Questions
- → Can I make these Oreo Cheesecake Cookie Cups ahead of time?
Yes! These cups can be prepared 2-3 days in advance and stored in the refrigerator. For longer storage, freeze them for up to 4 weeks in an airtight container. Thaw in the refrigerator before serving.
- → What can I substitute for black cocoa powder?
If black cocoa powder isn't available, you can substitute with additional Dutch-processed cocoa powder. Note that this will affect the final color and flavor, making the cookie cups slightly less dark and less similar to the Oreo cookie flavor.
- → How do I make Oreo cookie crumbs?
To make Oreo cookie crumbs, separate the filling from Oreo cookies (you can discard or reuse the filling), then process the chocolate cookies in a food processor until finely ground. Alternatively, place the cookies in a ziplock bag and crush them with a rolling pin until they form fine crumbs.
- → Why did my cookie cups crack when making the wells?
If your cookie cups crack when making the wells, it's likely because they were baked too long. The cups should be removed from the oven when they're still slightly soft in the center (about 10-13 minutes). Press the centers immediately while they're still warm and pliable.
- → How do I know when the cheesecake filling is properly mixed?
The cheesecake filling is properly mixed when the whipped cream is fully incorporated with the cream cheese mixture, creating a smooth, fluffy texture with no streaks. Be careful not to overmix, as this can deflate the whipped cream and result in a denser filling.
- → Can I use regular cocoa powder instead of Dutch-processed?
While regular (natural) cocoa powder could be used in a pinch, Dutch-processed cocoa is preferred for its smoother flavor and darker color. Using natural cocoa powder will result in a slightly more acidic taste and lighter colored cookie cups.